I've been thinking I should make a habit of taking photos during the process of making things. That way, If anyone wants to know how I did it, I can show them.
Today I started working in earnest on Zizza's back pack. I patterned it out Friday Night while watching "Shaun of the Dead" on the Tivo. Since that was before my decision to take photos, and since I was already multitasking with the Zombie movie, I didn't photograph that part.
Sorry.
Today I was working on all the little pieces that need doing before the main putting together can happen. Here's what I did;
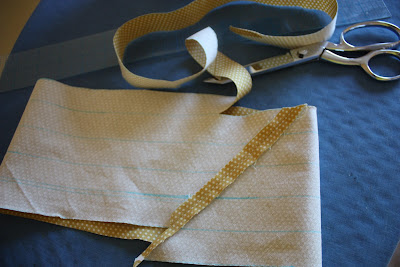
Cut a big heap of Bias. You can find instructuons for doing it this way in "Bend the Rules Sewing"
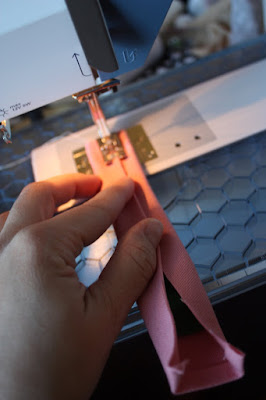
Once it's all cut add some cotton cord,
and you'll have...
piping!
Now to make some soft comfy straps. Start by pressing up a half inch on one long side of each strap piece. (I'll get back to the pattern eventually, but for now I'm pressing ahead with sewing instructions. Again, sorry it's out of order)
Now, to pad the straps. I could've used some nice versatile batting but since the indside of my straps will never be seen again, I decided to use up this stashed fleece and save my "warm and natural" for another day.
I folded my fleece (which was the same width as my canvas piece) into thirds, and positioned it thusly.
Fold the canvas around the squishy center,
and fold in the ends like you're wrapping a present. One side...
Then both sides. And press them that way. Also press those raw edges under.
Now take it to your machine and stitch right down the center.
When you get to the end, poke the nylon webbing for the adjustable portion of the straps inside.
Here's the thing though, this shouldn't be the long piece of webbing, as shown in the photos. It should be a short piece that's looped through a plastic strap adjuster. I did that wrong and had to pick out the step I'm about to show you.
Top stitch around the edge of the bottom portion of the strap.
Then sew an x across the middle, heavy on the back-stitching. You want to really hang on to that nylon webbing. It's going to take a lot of abuse.
Remember not to be like me. Sew the correct piece in here because it was a pain to un-pick.
Now, lets put those long nylon straps where they actually belong.
Start by cutting a pair of squares, about 3x3. Fold them in half, corner to corner and press.
Then do it again.
Also, notice the stains on my ironing board cover and the strange orange glow of artificial light glancing off the yellow walls in my sewing room, and surmise that I did this step after dark.
Tuck your nylon webbing safely inside your newly pressed triangles, stitch around the edge and across both ways.
Now the strap pieces are done, let's move on to the top handle.
Press in 1/2 inch on three sides. Cut a piece of padding (single thickness this time) 1" wide and 1" shorter than the finished canvas piece.
Wrap it up like we did the long straps and stitch down the middle.
Then stitch across each end where the padding stops. We'll finish these off with squares and x's of top stitching when we attach it to the back pack.
And here we have an inaccurate photo summary of what is covered in this post.
A butt load (4 yards) of piping, 2 squishy straps, a slightly squishy top handle, and an elephant appliquéd pocket front that you should disregard for now,replacing it in your mind with the image of a pair of webbing straps sewn securely into triangular pieces of canvas.
Until next time!
Subscribe to:
Post Comments (Atom)


2 comments:
What was your thoughts on Shaun?
THANK YOU!! I am one of those..."might need to know" ppl you are writing this for!!! :) I love tutorials...and this one is a keeper!
Post a Comment